
Adding Asante Bot to your Slack Workspace can take just a few minutes and a few clicks. Below is a detailed explanation of how to add this bot to Slack.
Step 1: Adding Asante Bot to Slack
The first screen you will see when you click Add Asante Bot to Slack is the standard Slack App installation screen.
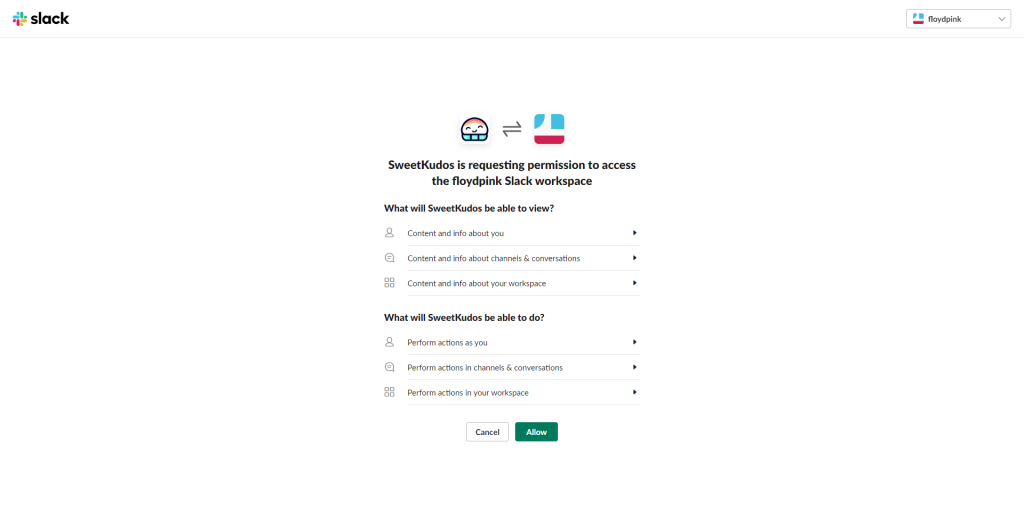
This is the screen where you select the Workspace for using Asante Bot. After clicking the “Allow” button, Asante Bot will be added as an App to your Workspace. This screen outlines the information we can access, gather, and modify. If you have any questions, please refer to our Privacy Policy.
Step 2: Choose channels where you want to use Asante Bot
Asante Bot works best if you select one or several channels where your team members can give recognition.

If you are uncomfortable adding Asante Bot to your Workspace, you can always skip this step and create a test channel to experiment with It before introducing it to the whole team.
Here is how you can manually add Asante Bot to a Slack channel
Select the desired Emoji and specify the number of Points
The next screen allows you to select your desired emoji and specify the number of Kudos your team can give daily.
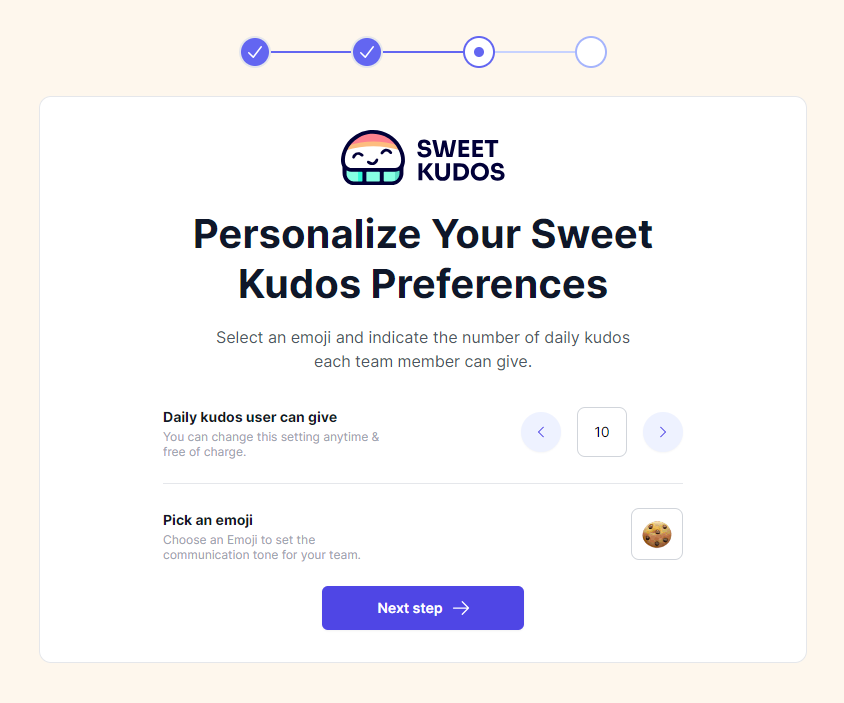
In this case, we have chosen to allow our team to give 10 Kudos per day, and the selected emoji for Kudos will be a 🍪. You can play with these settings and create an economy of your own using Emojis with the desired team language.
Don’t worry – you can change these settings anytime, and the system will update accordingly.
Step 3: Send welcome messages to Slack channels
Suppose you’ve opted to send a welcome message to selected Slack channels. In that case, Asante Bot will automatically deliver an introduction message, informing everyone that the specified channel aims to celebrate achievements and recognition.

Step 4: Give your first recognition Points!

Tada!!! You and your team are ready to go. Here’s an example of utilising Asante Bot to celebrate someone’s excellence. In this case, @Mark and @Jacob will get 4 Kudos each.